I’m new to using this fantastic software, and I’m kicking myself for not discovering it years ago! I’m really enjoying exploring its capabilities, but I’ve run into a challenge that I’m hoping the community can help me solve.
My Project: 3-Step Button Configuration
I’m trying to configure a 3-step button on my controller (PL-1) using Bome MIDI Translator Pro. Here are the specifics:
Input:
Controller: PL-1
Button: Sends G#1 note on/off
Desired Output:
MIDI Notes to Bome Virtual Port 1:
Step 1: C5 (note 72), velocity 127
Step 2: C#5 (note 73), velocity 127
Step 3: D5 (note 74), velocity 127
Visual Feedback to PL-1:
Step 1: G#1 (note 44), velocity 0
Step 2: G#1 (note 44), velocity 1
Step 3: G#1 (note 44), velocity 2
Functionality:
Each press of the G#1 button should cycle through the three steps
For each step, it should send the corresponding MIDI note to Bome Virtual Port 1
Simultaneously, it should send the visual feedback note back to the PL-1
As a newcomer to Bome MIDI Translator Pro, I’m not quite sure how to set this up correctly. Can someone please help me with the right translators or rules to achieve this functionality?
Any assistance, examples, or tips would be greatly appreciated! I’m excited to learn more about what this software can do.
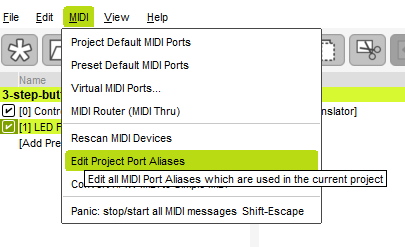
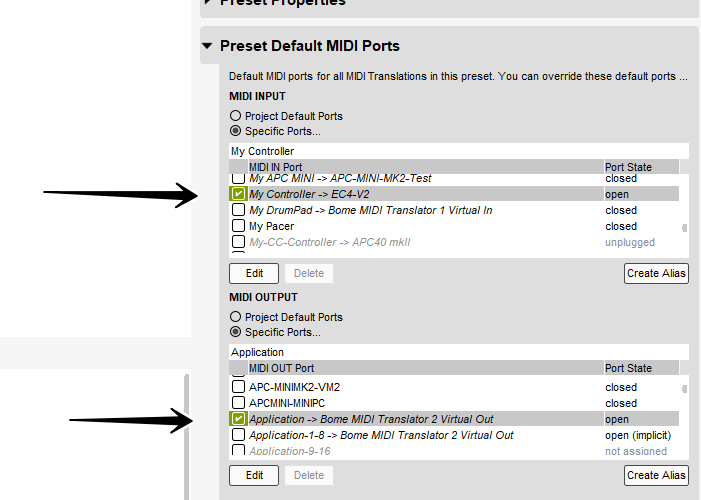
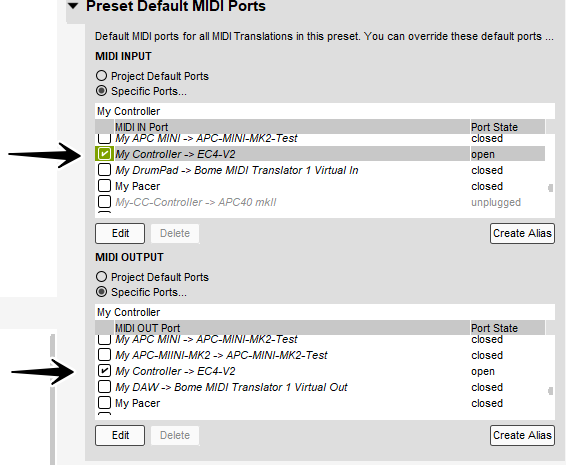
The second preset receives from the controller and goes back to the controller for LED feedback.
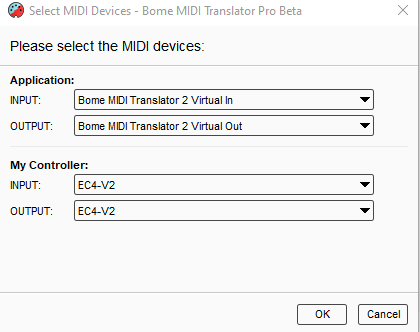
For more information about device selection, see this tutorial.
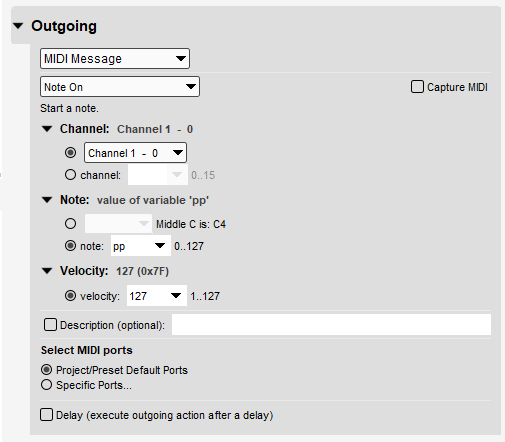
I use the global variable ga to control which step we are on in the rules of translator 0.0. Here are the rules where pp controls the note number and ga provides the step number.
// increment step
ga=ga+1
if ga>3 then ga=1

if ga==1 then pp=72
if ga==2 then pp=73
if ga==3 then pp=74

Log "Log Application step %ga% note %pp%"
We send the value of pp in the outgoing action;
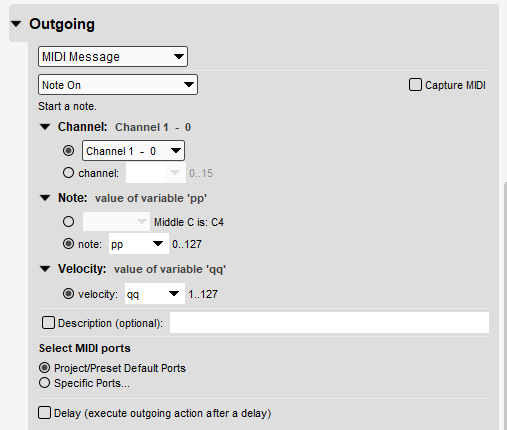
For translator 1.1 we also use ga for the step counter but set the outgoing value based on the step and put it in the local variable qq.
Here are the rules:
if ga==1 then qq=0
if ga==2 then qq=1
if ga==3 then qq=2
Log "Log Feedback Step %ga% velocity %qq%"
thx you very much… works like a charm. In the end, I did not need the led feedback part because that will come back from the notes I sent. That was easy to set up.