X-Touch MINI MCU Remap

Hello, I have a Behringer X-touch MINI and I want to remap the MC Nudge button (Layer B Button) to be a flip button.(MC Mode) How to do it as not to affect the functions of most of the Buttons, only few buttons will be reassigned with MCU command. I needed also a bank previous and bank next buttons.

This can be done with Studio ONE in the Mackie Control .XML but there’s no way In Cubase or other DAW that I can find.

Hi,

I have a template that allows you to move from Mackie Mode to Layer Mode by double pressing button 16 (record). Double press the same button and you will be back in Mackie Mode. In layer mode you need to program the outgoing action to whatever you want.

Double pressing button 8 while in Mackie Mode will Flip the V-POTs to faders. Double press again and it is back to V-POTs

I’ll email you more details since you asked via email.

Steve Caldwell
Bome Customer Care


Also available for paid consulting services: bome@sniz.biz

Hi Steve,

I noticed that the Encoder of Xtouch Mini when in Relative2 mode isn’t sending a clean data2 63=65 value when rotated fast, it overshoots to sometimes 61,62, CCW, and 66,67 CW.
It does function as intended when rotated slowly.

Can you help with the rules that it always sends 63CCW - 65CW?

Or maybe a global event for all the rotary in Relative mode?

Xtouch MINI clean CC output.bmtp (1.3 KB)

And can you share with me the Template where I can switch easily from Normal Mode to MC mode?
Thank you so much.

This example does this. We accept any value and set to qq, then we test the value and only activate it (using rules) if the direction is correct. We always send values of 65 (cw) and 63 (ccw)

Xtouch MINI clean CC output-sjc.bmtp (1.5 KB)

This should get you started, It will send back to the X-touch the mode and layer changes but doesn’t do any translation for the target application.

I use presets to enable Layer and MC mode. I set Mode Switch Preset to always enabled.

X-touch MINI - Mode Change.bmtp (2.8 KB)

Steve Caldwell
Bome Customer Care


Also available for paid consulting services: bome@sniz.biz

Thanks Steve.

It works perfect.

Glad to have been of help!

Steve Caldwell
Bome Customer Care


Also available for paid consulting services: bome@sniz.biz

Hi Steve,

I also noticed that in the MC mode the Vpot isn’t giving me clean 1 and 65 value how can I fixed this? this is crucial because I am using the controller in an AutoHotkey environment.

X-touch MINI - Mode Change.bmtp (9.4 KB)

Yes, the VPOTs are designed as follows

Negative movement range from 65 and up for negative movement depending on how fast you turn it. For instance 65=Left 1 66=Left 2 67 = Left 3 etc.

For positive movement 1 = Right 1 2= Right 2 3 = Right 3 etc.

If you don’t want this acceleration, you can implement a translator as shown in the attached file. Basically we look at the value of the incoming CC message and we limit the output to 0x41 (65) for left turn and 0x1 (01) for right turn.

Here are the rules. We use pp for the CC number and qq for the value.

// Only V-Pots
if pp<0x10 then exit rules, skip outgoing action
if pp>0x17 then exit rules, skip outgoing action

// -1 only for negative
if qq>0x40 then qq=0x41
// 1 only for positive
if qq<0x40 then qq=1

X-touch MINI - Mode Change-Constant-VPOT.bmtp (3.4 KB)

Steve Caldwell
Bome Customer Care


Also available for paid consulting services: bome@sniz.biz

Hello again,

It’s been quite a few years since I last worked with this. I’ve reached a point where I feel my Behringer X-Touch Mini is somewhat limited in terms of on-the-fly MIDI channel switching. I’d like to map it for use in DaVinci Resolve’s Color Page, which has a lot of color parameters, and the 8 dials (2 banks) on the X-Touch Mini feel restrictive.

Can you help me set up a way to remap the MIDI channel using the MCU button plus the 1–8 layer buttons? I want to be able to switch from Channel 1 (global) to Channels 2–16 depending on the button I press, essentially acting as a layer switcher.

Do you think this is possible?

Hi,

Yes, you can map the buttons as you indicated in your picture to work as buttons for MCU support. However, the color wheels would need to be mapped using mouse movements in fixed locations on the screen since Davinci Resolve does not use MCU for anything outside of Fairlight.

I can give you an example of a few buttons (maybe Bank Left and Bank Right) as free support but for a complete solution, it would require paid consulting. If interested, drop me an email at the address below.

You could also set up multiple layers so that you could reuse the controls (except the layer control) on your controller do do separate functions. For instance a layer (Bome preset) that handles MCU, and another layer that handles color wheels.

There are already some color wheel mouse mapping examples on this forum. You would need to match the encoders to position the mouse in the correct fixed location on the screen and have the knob twist motion drag the mouse cursor left and right. Maybe this one would help.

You pick one or two controls and I will show an example. Also I would need to know if you want to use the controller in MCU mode or Layer Mode (which would require converting the native MIDI into MCU midi functions).

Steve Caldwell
Bome Customer Care


Also available for paid consulting services: bome@sniz.biz

yes please Just a way for me to change bank and i will do the rest no worries about the Other thing i figured to write AHK using MIDI CC to grab and mouse move in Davinci Resolve

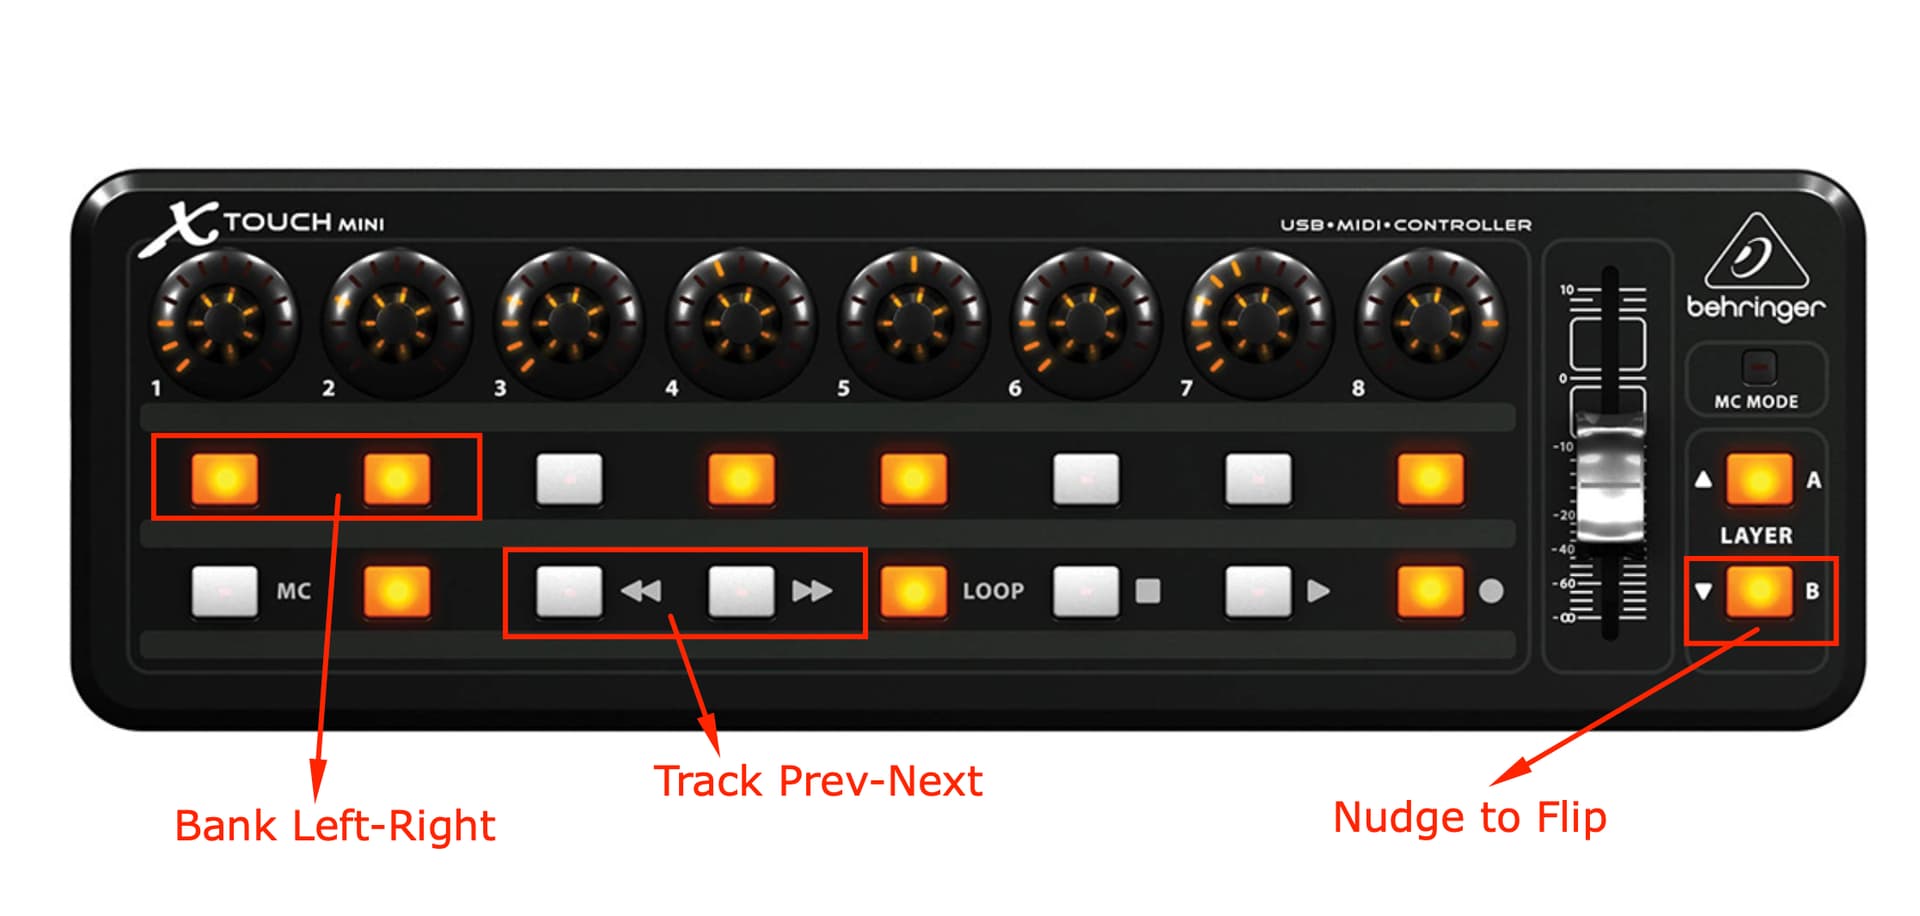
Hi, the attached project will pass through all MIDI messages untouched except Button 1 (which is now Bank Left) and Button 2 (Which is now Bank Right).

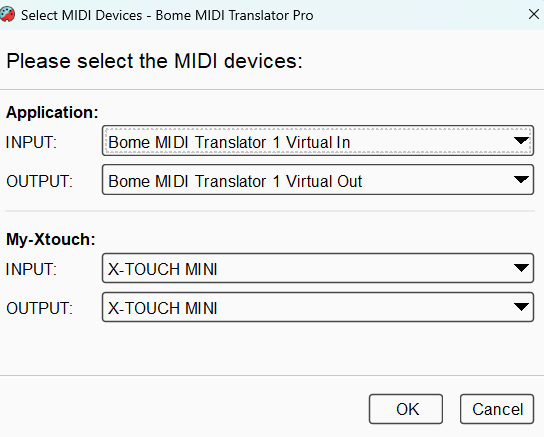
First, I assign aliases to my X-touch-MINI and to the ports that will be used by my Mackie MCU application. I used Ableton Live for testing.

You can learn more about aliases from this tutorial.

Then I set up MIDI thru paths in the Bome MIDI router to let all MIDI messages to through untouched.

Then I set up 2 presets (one for each direction) and set up the proper routing for the translators within those presets. Any translators here will override the MIDI thru paths I set up if the translator has the option “swallow” set.

For more information about device selection, see this tutorial.

For the translators goint to the application, I convert the incoming MIDI message from the controller button 1 to a Bank Left MCU message (note 46).

Like wise button 2 is converted to Bank Right (note 47).

These are translators 1.0 and 1.1.

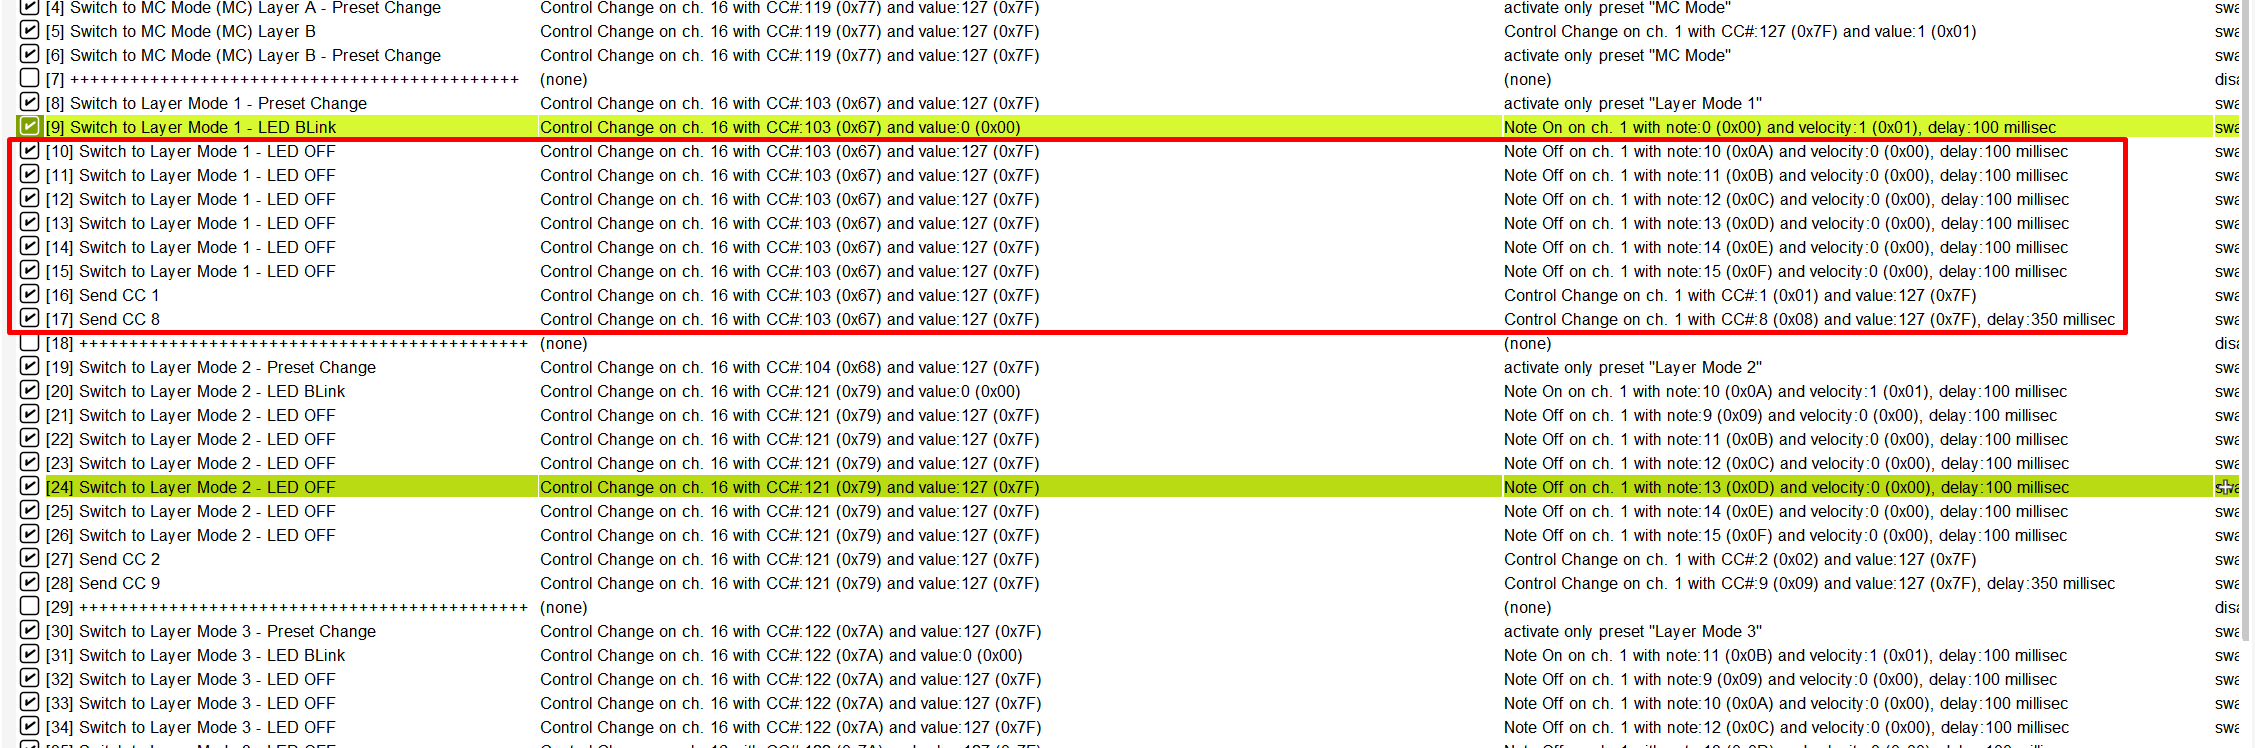
In order not to confuse what is coming back from the application, I block the MIDI messages that would turn the LED’s on or off for these two buttons. Notice that the outgoing action is “None” and the “Swallow” option is set.

For these messages I use raw MIDI and rules to only block notes (Note-On and Note-Off). I do this to reduce the number of translators needed. This way CC messages with these numbers will still get through the router.

//look for notes message
rr=oo&224
if rr!=128 then exit rules, skip Outgoing Action

These are translators 2.0 and 2.1.

For this example the X-touch MINI is in MCU mode which I set on the X-touch editor.

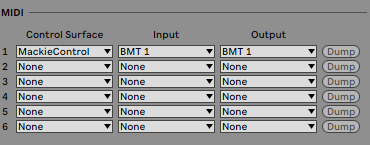
Ableton Live, in my case is set up like this.


image
image

As I said earlier, all other buttons and knobs should retain their native functions using the MIDI Thru paths in the router.

X-Touch-MINI-Bank-Modified-2025-12-15.bmtp (3.3 KB)

Steve Caldwell
Bome Customer Care


Also available for paid consulting services: bome@sniz.biz